little_duke
Member
Registered: 21st Aug 06
Location: Tamworth,staffordshire Drives: rover coupe
User status: Offline
|
Hi All
I was changing my dash bulbs which i got round to today,after searching the forum the only ones i found were for the pre 1997 corsa's which i believe post 97 corsa's have a few little different bits so heres my guide.anything else needed.u2u me 
WHERE TO BUY
CLICK HERE
TOOLS NEEDED
flat head screwdriver
2 phillips screw drivers 1x stubby and 1 normal
MAIN TOOL NEEDED
patients 
DURATION : Around 2 hours not rushing
CLOCKS
START
There will be 3 bolts under the steering wheel as arrowed


take them out

next you have 2 screws on the sides of steering wheel(you need to turn steering wheel 90 degrees to see these

once these 5 screws are out,you can take plastics off.REMOVE KEYS!!!


next you will have 3 bolts on the plastic covering the clocks as arrowed

remove these and take the plastic out

next you have 2 bolts and 1 clip holding clocks in,remove screws and push clip UP

REMOVE CLOCKS
 # #
on the back of the dials you will see 3 green bulb housings

remove these and fit your new bulbs.if you have LED'S and they dont light 1st time,turn them 180 degrees and fit again

TEST


RE-FIT DASH IN REVERSE ORDER AS TAKEN APART
-----------------------------------------------------------------
MFD DISPLAY
START
push vents down facing ground like so

push flat small screwdriver in without scratching dash

pop them down,you will know when its done

prise the sides of each vent with the screwdriver
(be careful not to scratch dash)

pull vents towards you


inside there are 2 screws(1 in each vent)

remove these
pop mdf up

turn it round and fit new bulbs
(you can take lead out but i found it easier to use pliers)

LEAVE IT APART AS YOU NEED IT FOR HEATER PANEL TO BE LOOSE
-----------------------------------------------------------
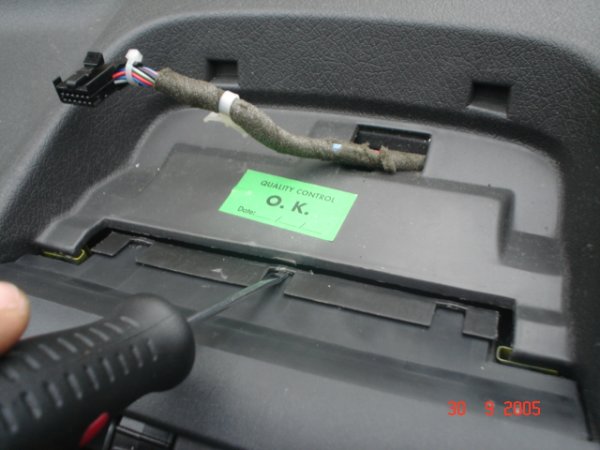
CIG LIGHTER
START
4 screws on ash tray(1 in each corner)
remove these
disconnect ash tray and dissconnect the bulb
fit new 1


RE-FIT AS TAKEN APART
----------------------------------------------------------------
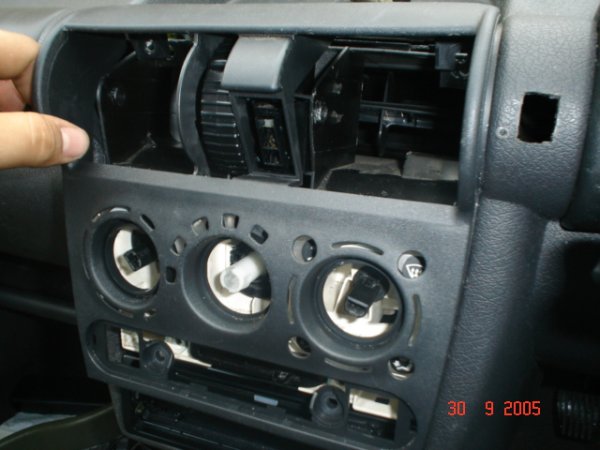
HEATER SECTION
(be patient with this as its the hardest bit)
START
with the mfd still off and the 2 top screw inside the vents undone
time to move on
take the little button off the heater panel

then the plastic section

you will see 2 screws behind

remove these
next is heater knobs
outside 2 just pull off

middle ones abit more tricky,place a flat screwdriver into gap and carefully prise it off ( dont snap the clip )

remove the hazard cover

the heater section should feel loose now
pull it out a little bit

and remove 3 clips near top
the heater panel is now FREE,be patient as it wont just come off in your hands.it will need abit of pulling and being careful will help
then you will see where the bulbs go
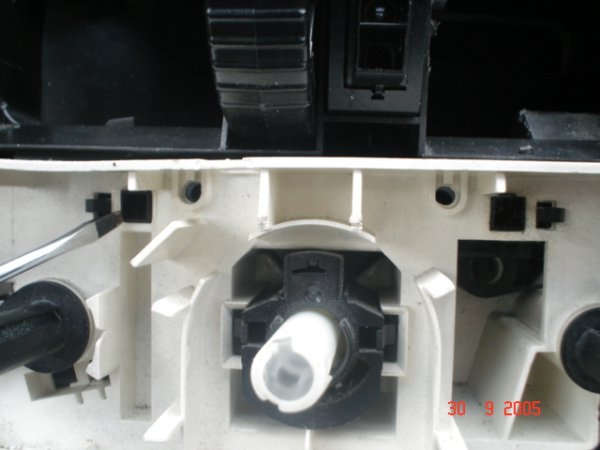
if you have bulbs there,they look like this

fit your new bulbs

then put dash back together
JOB DONE
[Edited on 28-02-2008 by little_duke]
|


